

How to Choose a Borescope: Probe Diameter, Length, and Resolution
If you have narrowed your search down to a specific tool but still can't decide between a dozen similar-looking listings, you are asking the right question. Learning how to choose a borescope is less about chasing the highest megapixel count and more about matching three physical constraints to the job in front of you: the diameter of the opening you have to get through, how far in the target sits, and how much detail you need to resolve once you get there. Get those three right and almost everything else falls into place.
This guide walks through each decision in the order a working technician actually faces it. If you are still deciding which category of scope you need, start with our breakdown of the types of borescopes — flexible, rigid, and video, then come back here to size one.
Start With the Access Hole, Not the Camera
The single most common buying mistake is picking a scope for its screen and discovering it won't fit the port. Your inspection access — a spark plug hole, a weep hole, a drilled inspection port, a turbine borescope port, a wall cavity — sets a hard ceiling on probe diameter. No amount of image quality compensates for a probe that physically cannot enter.
So before comparing products, write down three numbers:
- Smallest opening the probe must pass through (in millimeters).
- Distance from that opening to the target — the working length you need, plus slack for routing and bends.
- Smallest defect you must be able to identify — a hairline crack, a carbon deposit, a missing thread, a dropped fastener.
Everything below is about turning those three numbers into a spec.
Probe Diameter: The First Hard Constraint
Probe diameter is a genuine trade-off, not a "smaller is better" scale. Thinner probes reach tighter spaces but carry smaller sensors, dimmer LEDs, and more fragile cables. Thicker probes carry better optics, brighter light, and often four-way articulation — but they lock you out of small ports.
These are the diameter classes you will see most often on the market:
| Probe diameter | Typical access | Trade-off |
|---|---|---|
| 3.9 mm | Small drilled ports, fuel injectors, precision assemblies, tight electronics | Smallest sensor and weakest illumination; image is usable for presence/absence checks, less so for fine crack detection |
| 5.5mm、6.2 mm | Spark plug holes, most automotive cylinder inspection, HVAC line sets, gearboxes | The mainstream sweet spot — good balance of reach and image quality; the most common choice for automotive work |
| 8.5 mm | Larger inspection ports, castings, welds, tanks, pipe interiors, wall cavities | Best optics and light output in the consumer/prosumer range, but will not enter small ports |
| 11mm | Large-bore pipe, ductwork, chimneys, industrial vessels | Often paired with long working lengths; overkill and unwieldy for engine work |
Practical rule: choose the largest diameter that still clears your smallest access point with margin. If your tightest port is 8 mm, do not buy an 8 mm probe — you will fight it every time. Leave headroom for the cable's bend radius and for the angle of approach.
Working Length: How Deep Do You Need to Go?
Working length is the usable length of the probe from the tip to the handle or display. It is tempting to buy the longest one available "just in case," but extra cable is not free:
- Too short and the job is simply impossible.
- Too long and you lose control. A long semi-rigid cable coils, kinks, and pushes back; steering a tip that is several meters away through a bend takes real practice, and the excess cable is dead weight on every short job.
Match the length to the deepest routine inspection you do, then add roughly 30–50% for routing, not more. For engine and cylinder work, a 1-meter probe is usually generous. Drain lines, ducts, and long pipe runs are where multi-meter probes earn their keep.
Cable stiffness matters as much as length. A cable that is too soft cannot be pushed around a corner; one that is too stiff will not follow a bend at all. Semi-rigid ("gooseneck") cables hold whatever shape you bend them into, which is what you want for engines and cavities. Fully flexible cables are for gravity-fed drops down vertical pipes.
Resolution: What the Number Actually Buys You
Resolution is where marketing gets loudest and least useful. A few things worth understanding before you compare listings:
Sensor resolution and screen resolution are different specs
A listing may advertise a high-resolution display while the camera module feeding it is far lower resolution. A large, sharp screen showing a soft image is still a soft image. When a product page separates the two, read the camera spec.
Illumination and optics limit resolution long before the sensor does
Inside a cylinder or a duct there is no ambient light — every photon comes from the LEDs on your probe tip. If the light is dim, uneven, or reflecting straight back off an oily surface, a higher-resolution sensor just gives you a sharper picture of a badly lit scene. Adjustable brightness is one of the most underrated features on the spec sheet.
Depth of field decides whether the image is usable
Borescope optics are fixed-focus, with a defined range in which the image is sharp — often somewhere in the range of a couple of centimeters to roughly 10 cm from the tip, depending on the lens. If your target sits outside that window, it will be blurry no matter what the sensor can do. Check the stated focal range against how close you can realistically park the tip.
What to prioritize: for presence/absence checks (is the valve seated, is the fastener there, is there debris), modest resolution is fine. For condition assessment — scoring on a cylinder wall, hairline cracks in a weld, corrosion pitting — pay for better optics and brighter, adjustable lighting before you pay for pixels.
Articulation: Do You Need to Steer the Tip?
Articulation is the ability to bend the camera tip on demand while the probe is inside the space. It is the single biggest jump in capability — and cost.
- Non-articulating (fixed tip): you aim by rotating and pushing the cable. Fine for straight bores, wall cavities, drains, and general "look and see" work. Most affordable scopes are here, and for many jobs it is genuinely enough.
- Two-way articulation: the tip bends along one axis. Enough to sweep a cylinder wall or peek around a single bend.
- Four-way articulation: the tip steers in all directions, letting you inspect a full 360° around the probe and hold a view on a specific feature. This is what you want for serious engine, turbine, and weld inspection — checking every valve face in a combustion chamber, for example, is painful without it.
Side-view mirror attachments are a cheap partial substitute: they redirect the view roughly 90° so you can see cylinder walls with a fixed-tip probe. They work, but you cannot change the angle once the probe is in.
Durability, Sealing, and the Rest
A borescope lives in oil, coolant, and grit. Two specs quietly determine whether it survives the year:
- Probe IP rating. Confirm the probe is sealed for immersion in liquid — many are; the handle or display usually is not. Check which parts of the tool the rating applies to.
-
Cable jacket and strain relief. The tip-to-cable junction is where scopes die. Look for reinforced, oil- and fuel-resistant jacketing.

Then the convenience features: onboard photo/video recording for documenting findings, screen size, battery life for field work, and Wi-Fi or USB output if you want to review footage on a phone or laptop and hand it to a customer.
How to Choose a Borescope for Your Job
Putting it together, here is how the constraints typically resolve by application:
| Job | Diameter | Length | What to prioritize |
|---|---|---|---|
| Automotive cylinder / spark plug hole | 5.5mm、6.2 mm | ~1 m | Semi-rigid cable; articulation or a side-view mirror; bright adjustable LEDs |
| Engine, turbine, gearbox teardown avoidance | 3.9mm、5.5mm | 1–2 m | Four-way articulation; good optics; recording for documentation |
| Welds, castings, machined parts | 6.2mm、8.5 mm | 1 m | Resolution and lighting quality above all; close focal range |
| Pipes, drains, ducts, chimneys | 8 mm | 3 m+ | Working length; flexible cable; waterproof probe |
| Walls, HVAC cavities, home inspection | 5.5mm、6.2mm、8.5 mm | 1–3 m | Semi-rigid cable; wide field of view; battery life |
Your Pre-Purchase Checklist
- Measure your smallest access opening — the probe must clear it with margin.
- Measure the deepest target — buy that length plus 30–50%, not more.
- Decide what you must see: presence/absence, or condition and cracks. Only the second one justifies paying up for optics.
- Decide whether you must steer the tip. If you inspect combustion chambers or anything around a bend, you probably do.
- Confirm the probe's sealing rating and cable stiffness match your environment.
- Confirm the focal range matches how close you can get.
Next Steps
If you want the specs laid out head to head rather than in prose, our borescope comparison page puts the options side by side, and the borescope buying guide covers the same ground in checklist form. New to the category entirely? Start with what an endoscope is and how it works.
When you know your numbers, browse the range: Ralcam's industrial borescope cameras cover welds, castings, pipes, and plant maintenance, while our automotive borescope cameras are sized and articulated for cylinder and engine bay work. As a direct-from-factory manufacturer, we're happy to talk through a specific access constraint before you buy — send us the diameter and depth you're working with and we'll tell you honestly whether a scope will fit.
Looking for the right borescope?
Browse the full Ralcam range — industrial and automotive inspection cameras for every job.
Shop all borescopes →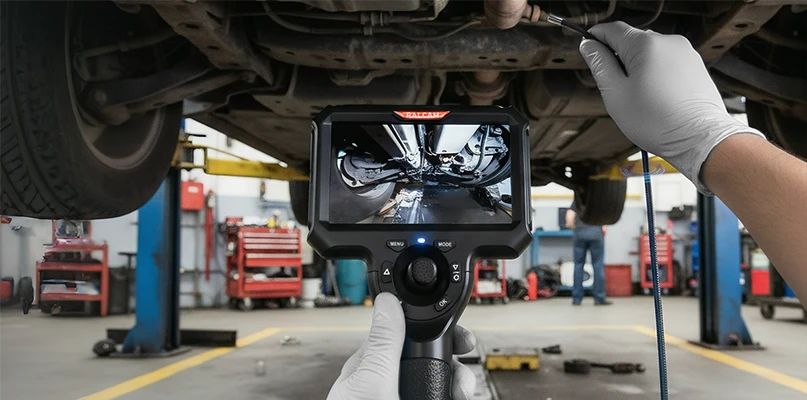
Leave a comment