

WiFi, USB, or Built-In Screen? Choosing a Borescope Display Type
Once you have settled on probe diameter and length, one decision is left that changes how the tool feels to use every single time you pick it up: how you actually see the image. The WiFi borescope vs USB borescope question — plus the third option, a scope with its own built-in screen — is less about image quality than about workflow. All three can deliver a similar picture. They differ in what you have to do to get to it.
This guide covers what each connection type is genuinely good and bad at, and which one fits the way you work.
The Three Ways to See the Image
- WiFi (wireless). The probe handle creates its own wireless network. Your phone or tablet joins it and an app displays the feed. No cable to your device.
- USB (wired). The probe plugs directly into a phone, tablet, or computer. The host device provides both power and the display.
- Built-in screen. The scope is a self-contained unit with its own display, battery, and storage. Nothing else required.
WiFi Borescopes
The appeal is obvious: nothing tethers the probe to your phone, so you can put the camera somewhere awkward and hold the screen wherever it is comfortable to look. Under a vehicle, up in a ceiling cavity, or around a corner, that freedom is genuinely useful.
Strengths
- No physical connection between probe and screen — real freedom of movement
- Works with a phone you already own, and a phone screen is usually larger and sharper than a built-in display
- Easy to save, review, and share footage — it is already on your phone
- Multiple people can sometimes view the feed, useful when showing a customer
Weaknesses
- Latency. There is a delay between moving the probe and seeing the movement on screen. It is usually small, but when you are steering a tip through a tight passage, lag makes precise control harder.
- Setup friction. You must connect your phone to the scope's network every session. Because that network has no internet, phones sometimes drop it automatically in favor of a connection that does.
- Battery. The handle has to power the camera, the LEDs, and the wireless radio. Runtime is shorter than a wired scope.
- Interference. Crowded wireless environments and thick metal or concrete between probe and phone can degrade the signal.
- App dependency. The experience is only as good as the app, and app quality varies widely.
USB Borescopes
The simplest and usually the cheapest option. A cable carries both power and video, so there is no radio, no pairing, and no battery in the probe.
Strengths
- No meaningful latency. The feed is effectively instant, which matters when you are threading a probe carefully or steering an articulating tip.
- No pairing. Plug in and it works — no network to join every time.
- No probe battery to charge or run flat mid-job; it draws power from the host device.
- Typically the lowest cost for equivalent optics, because there is less hardware inside.
- Works with a laptop, which is ideal for detailed review on a large screen.
Weaknesses
- You are tethered. Your phone or laptop goes wherever the probe goes, which is awkward under a vehicle or up a ladder.
- Connector and compatibility issues. USB-C, Micro-USB, and USB-A are not interchangeable, and phones vary in how they handle external cameras. Check compatibility with your specific device before buying.
- It drains the host device's battery rather than its own.
Built-In Screen Borescopes
A self-contained tool: probe, screen, battery, and storage in one unit. Nothing to pair, nothing to plug in, nothing to install.
Strengths
- Most reliable in the field. No app, no pairing, no compatibility question — turn it on and it works.
- No latency, since the screen is wired to the camera internally.
- Doesn't tie up your phone, which stays free for calls, notes, and manuals.
- Built for the environment. A dedicated tool tolerates oil, dust, and drops better than a phone does.
- Physical controls are easier to operate with gloves on than a touchscreen.
Weaknesses
- Screen quality is usually below a modern phone's in size, resolution, and brightness.
- Costs more than an equivalent USB scope, because you are buying a display and battery too.
- Getting footage off it means a memory card or cable rather than instantly sharing from your phone.
- Bulkier to carry and store.
WiFi vs USB vs Built-In Screen: Side by Side
| WiFi | USB | Built-in screen | |
|---|---|---|---|
| Latency | Noticeable | Effectively none | Effectively none |
| Setup each session | Join network, open app | Plug in | Power on |
| Freedom of movement | Best | Tethered | Good — one unit |
| Display quality | Your phone — usually best | Phone or laptop — best | Modest |
| Sharing footage | Instant from phone | Instant from device | Card or cable transfer |
| Field reliability | Depends on app and signal | High | Highest |
| Typical cost | Middle | Lowest | Highest |
Which One Fits Your Work?
- Occasional DIY, tight budget, work at a bench or in a garage. USB. Cheapest, simplest, and the tether does not matter when you are not moving much.
- Working under vehicles, in crawl spaces, up ladders. WiFi. Freedom of movement is worth the latency and setup friction.
- Daily professional use, dirty environments, gloves on. Built-in screen. Reliability and durability beat screen quality when the tool has to work every time.
- Documenting findings for customers or reports. WiFi or USB into a phone — footage lands where you can immediately send it.
- Precise steering with an articulating tip. Avoid WiFi if you can. Lag and fine tip control are a poor match. See our guide to articulating vs non-articulating borescopes.
What to Check Before You Buy
- For USB: confirm the connector matches your device, and that your phone or computer supports an external camera.
- For WiFi: check that the app is available for your operating system and read recent reviews of the app specifically — not just the hardware.
- For built-in screen: check screen size and whether it records to a memory card, and confirm the battery life covers a working session.
- For all three: display type is the last decision, not the first. Probe diameter and working length still determine whether the tool can reach the job at all.
Start With the Probe, Finish With the Screen
Display type shapes your daily experience, but it cannot rescue a probe that does not fit or reach. Settle the physical constraints first — our probe diameter guide and the broader how to choose a borescope guide cover that — then pick the connection type that matches how and where you work. If you are still sorting out the basic categories, start with types of borescopes explained.
Ready to compare hardware? Line up specs on our borescope comparison page, then browse the automotive borescope cameras range for engine work or the industrial borescope cameras range for maintenance and inspection. Ralcam builds these in our own factory in Shenzhen — tell us where you will be using the scope and we will tell you which display type actually makes sense for it.
Looking for the right borescope?
Browse the full Ralcam range — industrial and automotive inspection cameras for every job.
Shop all borescopes →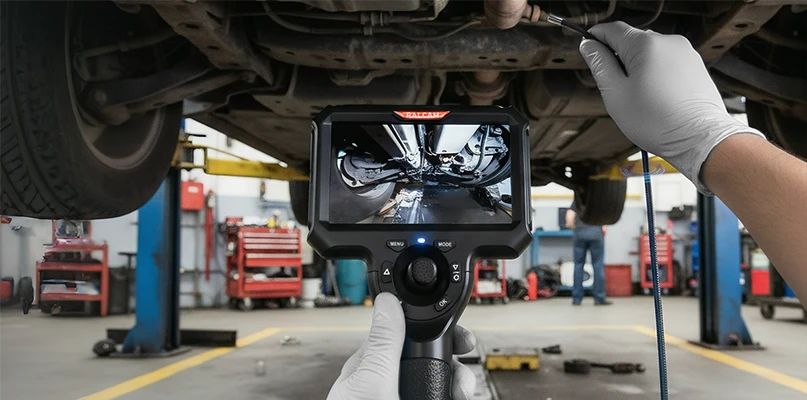
Leave a comment